To turn map points of interest into a route you can follow, first enter the target region so its markers appear, then scout the nearest watchtower. From the vantage point, aim the camera at every distant white dot and complete every investigation. Reopen the map and look for new markers to confirm the scout registered. A map icon is only a lead: it does not prove the reward, entrance, or trigger.
Identify the step that is blocked
| Goal | Where to start on this page | Completion check |
|---|---|---|
| Too few map markers | Enter the region → climb → investigate white dots | New markers on the map |
| Quest marker but no journal entry | Tracking versus accepting an NPC quest | Matching objective in the journal |
| Unable to ascend a tower | Named tower approach sections below | Complete scouting, not just reaching the roof |
| Shrine travel unavailable | Activation, restoration and named shrine sections | Destination selectable in the shrine menu |
| A specific item | Follow its item or quest guide | Named item in inventory, not merely a map icon |
This is an exploration and landmark-route index, not a complete coordinate list. Unconfirmed rewards or containers below are not guaranteed acquisition routes.
Tracking an available quest does not accept it
For an NPC quest, select the map's Available Quest marker and track it, then identify the person named by the interaction prompt. Talk and choose the accepting response; afterward, open the journal to check the new objective. This sequence follows ATH's side-quest guide. A compass marker alone confirms navigation, not acceptance. If the HUD still shows another task, check the journal before assuming you refused; prerequisites and time-of-day conditions belong to each quest's own walkthrough.
Bandit camps: search after the fight
- Follow a revealed camp marker and resolve the encounter before searching.
- Sweep with Focus. Check containers, bodies and loose documents; a map need not be inside the main chest.
- Read any treasure map and track its separate activity. Use the treasure-route index to choose the matching dig site.
Finding a manual is also separate from learning its skill; follow the reading and unlock checks. This is not a verified fifteen-camp location list. Do not assign every fight a fixed time cost or assume every mound has a spare shovel; read actual prompts and check your inventory.
A cave marker is not a specific reward route
Check the marker's day/night condition, then match your objective before travelling. ATH's lair overview does not provide a point-by-point location list, so it cannot establish every cave entrance or loot table.
- Bear den letter and hidden cache: follow Into the Den; the corpse's letter starts a separate search.
- Tatzelwurm Gland: choose between the Pale Ravager quest trail and general ingredient lair.
- Fairy-led Murohn encounter: follow Come Hither, including the conversation after leaving the burrow.
Do not assume all lairs are time-free or that every kill awards a Skill Point. Read the final interaction and current journal; the routes above have different completion checks.
Enter the region before guessing from the map
- Choose the area you want to explore, travel into it, and open the map to see newly revealed points. The official recap confirms that entering regions reveals points of interest; an empty area on a map you have not entered is not proof that nothing is there.
- Track the nearest watchtower.
- Before travelling, note one stable landmark such as the tower, shrine, bridge, or camp. Start later route checks from that landmark instead of trying to recognize an imprecise patch of forest or hillside.
Clear the condition that blocks the tower
- At the tower, read the objective and local prompts first. Some towers are a direct climb, while others have enemies, blocked paths, or traversal requirements. Do not assume every tower can be climbed from an outside wall.
- If an ability says it cannot be used during combat, finish the nearby encounter before searching for the ascent. The From Above tower is an example: clear the base and use the rear scaffolding to enter.
- Do not treat an unverified enemy count, level, time, or key binding as a route requirement. Follow the on-screen ability prompt and your own Controls settings.
Investigate every white dot from the summit
- Do not leave immediately after reaching the top. Wait for the scouting-area objective or equivalent prompt, then turn the camera toward the marked white dots in the distance.
- Hold the camera roughly on each dot until an investigation prompt appears, then complete it. Pinpoint aim is unnecessary, but every point must register.
- One or two investigated dots leave the objective incomplete. If scouting remains active, return to the vantage point and sweep the full horizon for a dot that did not register.
Confirm that scouting worked on the map
- After the final investigation, watch for the quest-end notice or objective update, then reopen the map. Newly visible points are the practical proof that the scout worked.
- If the map has not changed, do not assume a bug first. Check for a missed white dot, an unfinished encounter, a blocked ability, or a ledge that was not the real vantage point.
- Question marks and new markers are still unverified leads. Sort them into markers with a journal objective, a visible landmark, or no clear prompt, then choose your next stop.
Turn a marker into a route you can verify
- Choose a nearby marker with a clear starting point. Open the journal and note the first object or NPC to find, rather than memorising only an area name.
- At the location, compare the landmark with the journal and then look for an interactable object, trail, or conversation. Do not leave just because you reached the circle or an icon disappeared while the objective has not advanced.
- Keep three checks for every route: a starting landmark, a mid-route clue, and a final interaction. Dead Drop is a useful pattern: the burial ground starts it, footprints and tree carvings bridge the route, and the stash below the fallen trunk is the finish.
Tour Guide Training: count settlements, not shrines
Compare your visits against Laslea, Military Camp, Maragir, Parlita, Svartrau, Tantari, Oghasti and Uriash Village. PowerPyx distinguishes the settlement’s three-house marker from a single house. An activated shrine elsewhere in the same region is not another village.
- Select the settlement marker and physically enter its area. A revealed icon alone does not confirm a visit.
- For Military Camp, check the guarded entrance rather than counting a distant scouting view. ATH describes dealing with the entrance guards before entering; do not substitute an unrelated soldier camp.
- For Uriash Village, complete A Friend Like This, then follow Song of the Mountain. An early boundary warning is a prerequisite check, not a reason to keep attempting jumps around it.
- Once admitted, enter the village and activate its shrine. ATH associates this with the achievement, while PowerPyx establishes the quest-gated visit; the exact minimum registration trigger has not been independently verified here.
- If the achievement remains locked, compare all eight names again and revisit any settlement only seen from outside. Check the platform achievement list rather than counting every shrine icon you own.
This checklist does not claim the eight settlements have identical entry conditions. Follow the village quest’s choices if preserving its inhabitants and services matters to your run.
Read time prompts before committing
Exploration and travel do not advance story time on their own, but an individual activity can display an hourglass cost. Before confirming a quest step, dig, or another committed interaction, read that prompt. The stated cost applies to that action; it does not automatically describe all movement in the area.
If you only need to establish a route, enter the area, scout the tower, and record the landmarks before committing to a time-costing activity. You can then return with a verified entrance, clue chain, and endpoint instead of starting from an untested icon.
Detailed city and companion routes
Fast travel: activate both ends first
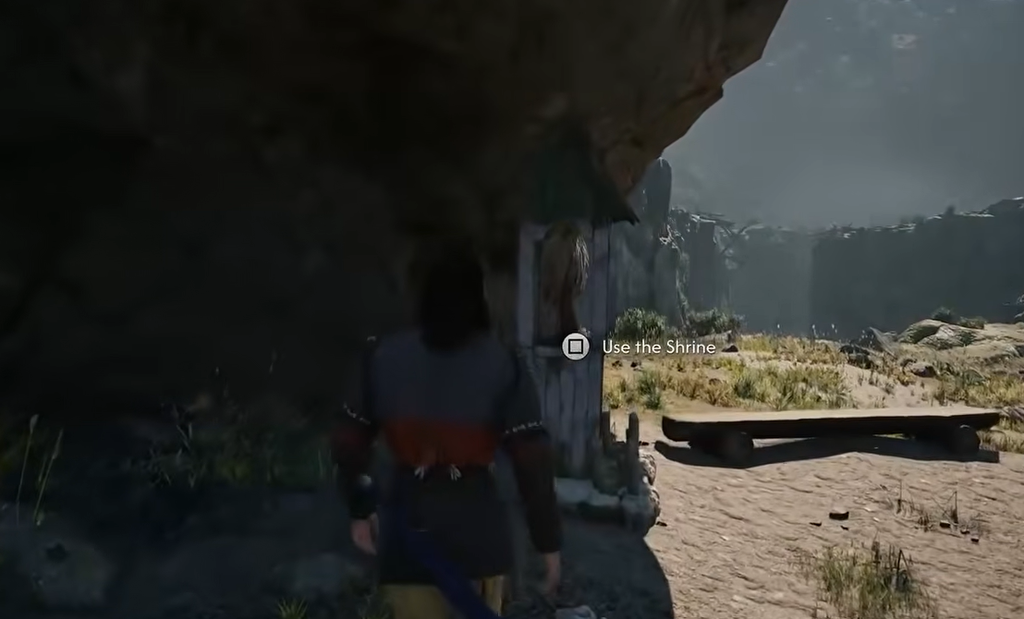
- Reach a working shrine and interact with it to activate it. Merely seeing its map icon is not enough.
- At an active shrine, choose Fast Travel, then select another activated blue shrine on the map.
- Confirm the destination. If it is unavailable, check whether that shrine still needs activation or restoration.
A ruined shrine requires its missing heart to be returned before use. Follow the Hidden & Safe restoration steps if that is your current quest. Finding a heart and restoring its shrine are separate interactions.
Ordinary exploration does not advance the main clock, as explained in the official gameplay recap. Shrine travel also has no time cost according to the ATH fast-travel guide. Waiting, learning skills and restoring shrines are separate actions: inspect their time prompts instead of treating every shrine interaction as free.
Boar’s Back Tower: enter through the raised opening
Look for the ruined tower at Shrike’s Crag, west of Svartrau. Use the night route described by ATH:
- Face the opening partway up the outer wall and Shadowstep inside.
- Target the next wooden platform or beam, not the summit in one jump. Use Planeshift where the intervening stonework permits traversal.
- At the top, complete each Scout the area interaction before checking the map.
An Out of range message calls for a closer launch position. Looting a chest is separate from completing the survey; this route does not guarantee its contents.
Maragir Wealds shrine: check the rear tent
ATH's shrine route reports a destroyed shrine southeast of Maragir. Inspect it, then follow Focus tracks north toward the soldier camp west of Lower Maragir Wealds. After resolving the encounter, search the chest inside the rear tent for Maragir Wealds Shrine's Heart, rather than relying on corpse loot. Confirm the named item before returning to place it at the damaged shrine. Exact landmarks and loot remain unverified here; review the repair prompt's actual cost and check the shrine menu afterward.
Maragir Wealds Tower: aim above the broken stairs
Find the tower on the eastern edge of Maragir Wealds and approach at night. Clear the specter encounter before climbing.
- Enter at ground level and use intact stairs until the route breaks.
- Shadowstep through the gap in the wooden floor above, then aim above the collapsed stair section.
- Continue to the high inner ledge and remaining steps. At the summit, investigate every survey marker.
For an invalid red target, cancel and select intact flooring. For Out of range, move closer rather than repeatedly confirming. The two ATH accounts differ in how they sequence the encounter and exterior approach; exact footing should follow your visible terrain.
Silts Tower: the locked door is not the scouting route
Track Silts Tower and approach at night. The ATH accounts disagree about the surrounding terrain; use the named map marker rather than a snow-versus-marsh description.
- Find the exterior wooden scaffolding. Use Shadowstep to reach its platforms and continue upward.
- Where the timber ends across a gap from the tower, target the stone wall with Planeshift. Follow the outer wall onto the roof.
- Continue to the roof’s highest point and complete the survey interactions. Reopen the map to check the revealed markers.
Opening the upper interior door begins Home Sweet Home, a separate dream route. It is not required to survey the tower. Preserve a save before choosing that quest; merely opening the door is not the Together Forever completion condition.
The balcony chest is a separate loot stop. For the flask in the interior, follow Quicksilver’s post-quest return; scouting alone does not complete that pickup.
St. Tyna’s Grove Tower: reach the lookout pole
Track the named tower and approach at night. ATH describes using the adjacent rocks to reach the structure above the undead near its base.
- Reach the scaffolding from the rocks, or clear the enemies before approaching from below.
- Check the boards blocking the scaffold route. The source describes breaking them; the exact attack or ability is unconfirmed here.
- Shadowstep between nearby platforms, then interact with the lookout pole on top. Complete the distant survey points rather than leaving after the opening camera sweep.
If traversal remains unavailable, check whether combat is still active. For a distant target, reposition onto a nearer platform first.
Grove Tower: inspect the interior before leaving
ATH's survey guide places the approach west of Pilgrim's Trail Shrine. After surveying, descend through the opening onto the interior wooden levels and inspect the chest before returning outside. It reports a Lasting Malediction Manual and Ring of Regeneration there; confirm the actual loot names, as the pictured item's fixed level and bonus are not independently verified here. Chest loot and completed surveying are separate checks. Descend in stages rather than jumping into the enemies below.
Tantari Tower: reach the pillar’s base first
Follow the Tantari Tower marker at night. The rocky approach brings you level with the tall stone pillar; starting too far below the cliff leaves the scaffolding out of reach.
- Follow the rocky path upward to the pillar’s foot.
- Shadowstep onto the attached wooden boards, then use successive platforms as staging points.
- Where boards end, use Planeshift on the stone wall to reach the next ledge. Continue to the summit survey interaction and check the map afterward.
Scouting and chest loot are separate checks. This route does not claim a particular manual or that this tower alone awards the all-towers achievement.
Neustadt Tower: start from the West Gate rooftops
Track the tower in southwestern Svartrau and approach at night. The route starts beside the West Gate wall, not with a ladder directly beneath the spire.
- Shadowstep onto the adjacent battlements, then the nearest roof. Watch for the trespassing warning and guards before committing to the next move.
- Cross toward the marker using nearby roof edges, peaks and chimneys as intermediate targets.
- From a close roof, look for a valid target toward the spire. One ATH account uses a direct Shadowstep; the other describes climbing the roof sections. The exact final footing remains unconfirmed here.
- Use Scout the area when it appears, then inspect every distant white marker. If the map remains unchanged, re-enter the survey and check for an overlooked point.
The articles disagree about XP and skill-point rewards, so neither number is promised. Complete the map interaction rather than using a reward amount as proof.
Cathedral Tower: continue from the roof to the cross
Track Cathedral Tower inside Svartrau’s Cathedral Complex and approach at night. The main entrance is not the start of this ascent.
- Circle to the building’s side and find the scaffolding against its wall.
- Follow the climb past the boards and stained-glass section to the roof, using the available traversal prompts.
- Face the spire and use the prompt leading to the summit cross. Being on the roof alone is not the final checkpoint.
- Investigate each highlighted distant point, then check the map before descending.
For the separate locked building in the garden, use the cathedral-library access guide. Reaching this viewpoint does not unlock that door.
Church Tower: use the lower roof as a staging point
Track Church Tower and approach at night with Shadowstep available. This is separate from Svartrau’s Cathedral Tower above.
- Stand where the church’s lower roof is visible and aim Shadowstep at that roof.
- From the sloped roof, face the bell tower and target its peak for the next move.
- Start the survey and investigate each white point until control returns. Check the newly revealed map markers before leaving.
The route uses the roof as an intermediate landing; do not assume you must teleport from the ground straight to the summit. Exact loot is not guaranteed here.
Rockfalls Tower: climb inside the ruin
Track the tower south of Oghasti and approach at night along the mountain path and stone steps. Use a valid Shadowstep target where the approach crosses broken terrain.
- Enter the opening at the ruin’s base.
- Look upward for projecting wooden boards and move between them with Shadowstep.
- Reach the upper platform, investigate every survey point, then reopen the map.
If an exterior attempt keeps failing, return to the base opening and use the interior boards. The source’s universal stamina-limit claim is not verified here; the interior route provides the described alternative without requiring that assumption.
Broken shrines: recover the matching heart
Inspect the damaged shrine and track its named activity. These ATH location leads distinguish three recoveries; their precise positions have not been independently verified here.
| Activity | Where to inspect |
|---|---|
| Crossroads Inn | Follow Focus footprints to the riverbank backpack, then toward the northwest soldier camp; inspect the main tent’s chest. The article’s regional place names remain unresolved. |
| Small Bridge | Resolve the guards and Banneret encounter, then check bodies for Small Bridge Shrine’s Heart. Crossing the bridge for Sara’s quest is a different objective. |
| Western Slopes | Check the nearby bandit-camp chest for the named heart and orders. If you found them first, track Western Slopes before returning to the shrine. |
For another location, follow the Bear's Maw heart and restoration guide.
For the forest trail and stone-pile pickup, see Oghasti Crossroad shrine restoration.
Small Bridge: identify the activity and missing loot
In southern Briar Sloughs, inspect the destroyed-shrine marker below Mert's outpost and select Show in Journal. Check whether the tracked objective is Stop the soldiers before searching bodies. Use Focus around the clearing and inspect each corpse for the named heart; the orders note is not its replacement.
ATH's repair article reports three soldiers, whereas the other account mentions Banneret. Enemy composition remains unconfirmed. After placing the heart, check that the activity closes and the map marker becomes usable; do not judge completion from the loot window alone.
Carry the correct heart back and use the restoration interaction. Check the journal and whether shrine services become available; reaching the camp or reading orders alone does not place the heart. Read the time prompt before confirming. If the option is missing, check the item’s full name and your last uncompleted objective rather than assuming another shrine’s heart will work.
Lupila Riverpass: follow the trail to the military camp
ATH's shrine roundup places this shrine southeast of Parlita and the recovery camp northeast of the shrine. Inspect the damaged shrine, use Focus on nearby clues, then follow the tracks into the camp. Gamer Guides' journal entry confirms that search sequence and a further Focus search inside the camp.
Search for Lupila Riverpass Shrine's Heart, confirm the pickup, then return to install it. The precise container is unverified here; defeating soldiers alone is not confirmation that you collected it. Check the restoration prompt and normal shrine menu afterward.
Prince's Crossing: search the body after the wolves
NightlyGamingBinge places the shrine in northeastern Svartrau Outskirts. Inspect it, use Focus to reveal footprints, and follow them to the wolves. After resolving the encounter, search the human body marked by fireflies for Prince's Crossing Shrine's Heart; wolf loot is not the required item. Return to the same shrine and complete its repair interaction.
These additions are location checks, not a complete list of every damaged shrine. Missing interaction prompts can have more than one cause; check the named heart and tracked objective before repeating a fight.
Market Tower: climb, then complete the survey
ATH's Market Tower article describes tracking the named tower, finding its wooden scaffolding and following ladders to the roof. At the top, start the survey and confirm valid distant landmarks; an out of range target requires choosing another point. Reaching the roof alone is not the described completion. Check the map after finishing the sequence, but do not treat the presence of Untrack as proof of success. Its “Schoenau” city label and exact climbing line remain unverified; identify the tower by its activity name.
Western Slopes: locate the camp container
ATH places the camp in a forest clearing east of Coward’s Path. Check the wooden box beside the tent for Western Slopes Shrine’s Heart, then return to the matching damaged shrine. If you already carry the heart, follow the restoration objective rather than searching bandit bodies again. The source contradicts itself about needing to inspect the shrine before the item appears; that spawning requirement remains unconfirmed.
Follow the trail, then check the disputed pickup
ATH's destroyed-shrine guide describes Focus footprints northeast from the shrine into the forest camp. After dealing with hostile enemies, scan the tent-side containers. Its account puts the heart in a crate, while the second repair guide says to loot bodies. This container-versus-corpse conflict remains unresolved: check the box first, then nearby bodies if the named item is absent. Ordinary equipment does not identify the correct pickup.
Verify placement at the shrine
Select the Western Slopes restoration objective on the map and use its journal shortcut if needed. Follow that marker back rather than treating “south” as a universal direction from anywhere in camp. Confirm the displayed time cost, then perform the repair interaction. The second guide describes the prompt changing to Use the Shrine after the quest ends. Check that menu and the now-usable map marker; dismissing a crafting tutorial or merely carrying the heart is not the restoration action.