For Laslea Glen treasure, take the map from the bandit house in Outlaw’s Gorge, then travel east to the bear-guarded cave. After the bear is down, sheath your weapon, use Focus to identify the highlighted loose-earth mound, collect the shovel from the cave wall, and confirm the dig. The map, bear, and mound are checkpoints; only looting the chest and seeing the quest-end notice completes the activity.
Start at the Outlaw’s Gorge map table
- Find Outlaw’s Gorge Shrine on the eastern side of Laslea Glen. Follow the slope uphill toward the abandoned house.
- Enemies outside the house block the entrance. Leave room to move sideways before fighting; no verified level, gear item, or fixed combo is needed for this route.
- Once clear, enter the house and take Treasure Map: Laslea Glen from the wooden table near the door. That pickup adds the activity to the tracker. If no objective appears, return to the table and confirm the map reached your inventory.
Use the red X as a direction, not a coordinate
- Press M to open the map. The red X on the parchment is approximate, so do not match it pixel by pixel. Starting at the cleared house, place a custom marker in the pocket of hills east of it, where the bear cave is located.
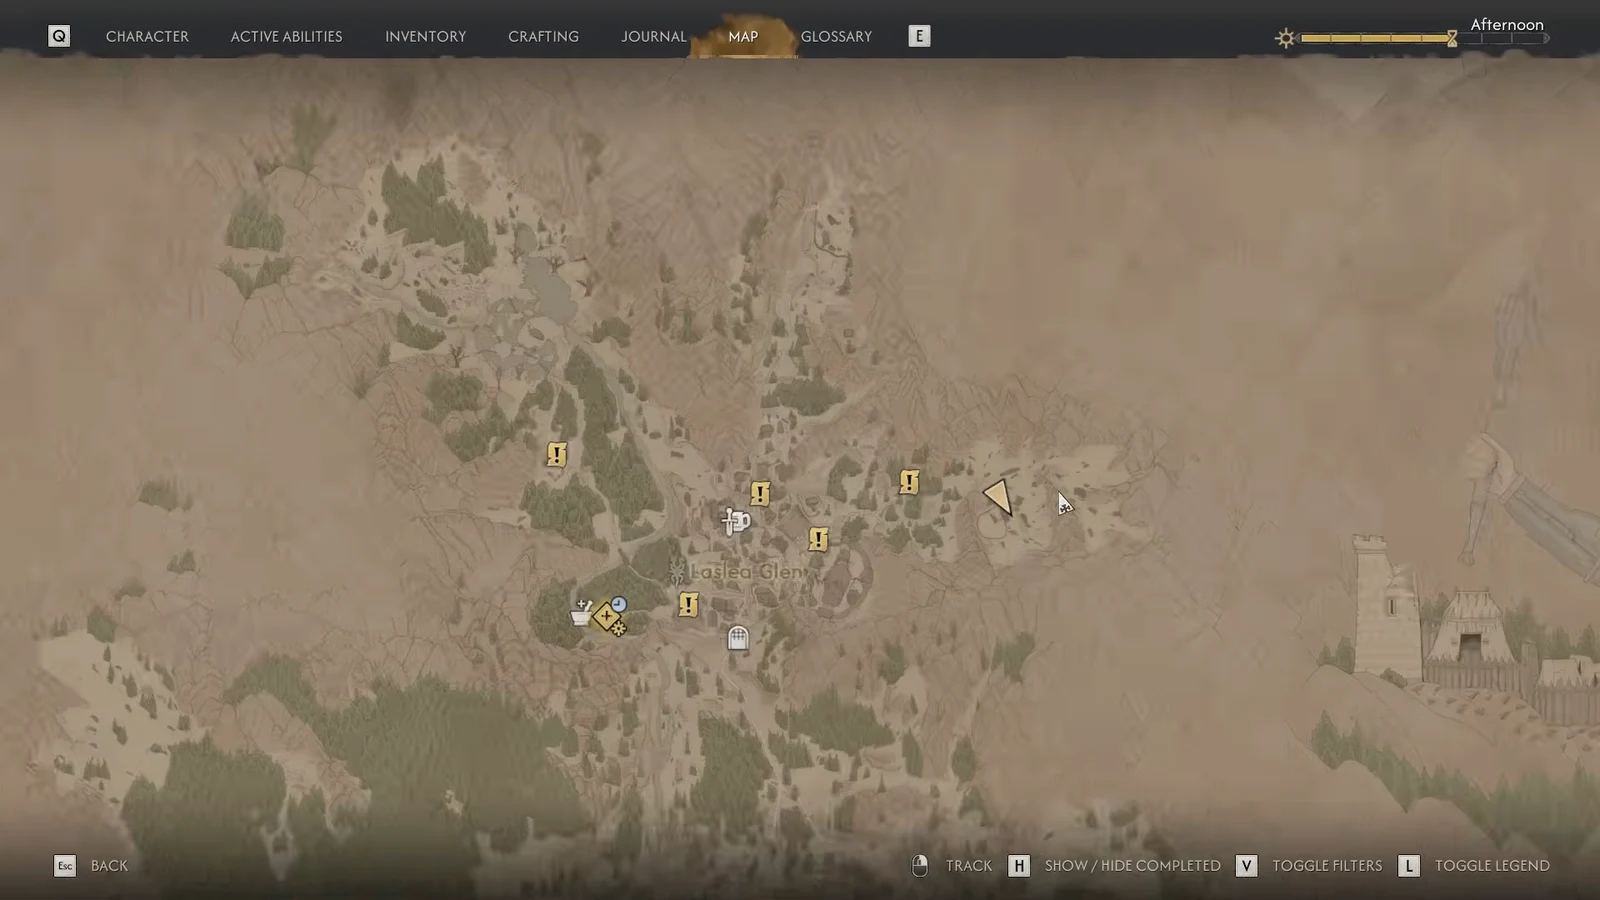
Clear the bear before searching the mound
- Do not circle the mound for an interaction while the bear is alive. First make the cave safe to move around. Its straight charge and forward slam after it rears up are both unblockable.
- On PC, hold a movement direction and press Space to dodge sideways. Leave the bear’s front when it starts the charge or rears up, then counter after the animation ends or move out and wait for a clearer opening.
- A perfect dodge can create a counter opportunity, but do not force it when the opening is unclear. The sources support the two unblockable attacks and the sideways response, not a fixed damage total, kill time, or mandatory weapon.
Use Focus to find the correct mound and shovel
- Once the bear is down, sheath your weapon and hold right mouse for Focus. The correct patch of disturbed earth highlights; the bear corpse, ordinary dirt, and rocks are not the digging interaction.
- If interacting with the highlighted mound asks for a tool, inspect the nearby cave wall. The shovel is against it. Take it, then return to the same highlighted mound rather than searching outside the cave.
- Read the hourglass prompt before confirming. Digging spends one time segment. That applies to the dig itself, not to the walk from the shrine or ordinary movement inside the cave.
Looting and the quest-end notice are the check
- Confirming the dig reveals a chest. Open it, take the contents, and check the tracker or quest-end notice.
- The route is still incomplete if you only found the mound, defeated the bear, or exposed the chest without looting it. The last required action is the chest interaction and activity update.
Which weapon should the chest contain?
Check the buried chest for Polished Long Cleaver, then equip it from inventory. The nearby corpse’s Long Falchion is a different pickup; looting that corpse does not replace digging up the treasure.
The newer ATH treasure-and-rewards article recommends Shadowstep against the bear even while framing this as a prologue route. That ability is not established as available at this stage here, so use the dodge instructions above. Its fixed damage and “best until level” claims are not guarantees for your equipment.
Recipe collected but Minor Fortitude Paste is missing?
ATH lists Recipe for Minor Fortitude Paste among the buried chest's rewards. If you obtained it, open and read that item in your inventory, then look for Minor Fortitude Paste in the crafting list's melee-attack category. Carrying the unread recipe is not the same as unlocking production. Check the selected recipe's current ingredient requirements before gathering supplies; this site has not independently verified the drop or ingredient quantities.
PC keys and common blockers
Press M for the map, and hold right mouse for Focus while the weapon is sheathed. For interactions or loot, follow the binding shown by the on-screen prompt; if you remapped controls, the game’s Controls screen is the source of truth.
If the map is missing, return to the table by the house door. If you have it but cannot find the cave, start at the house and reset the eastward marker. If there is no interaction in the cave, sheath your weapon and use Focus. When stuck, return to the previous confirmed checkpoint instead of skipping the map, bear, mound, or shovel.
The two additional ATH accounts disagree on whether the map is required before the dig site becomes usable. Taking and reading the map first remains this guide’s route; finding the cave early does not establish that the entire activity can be completed without it.
Continue: Knightly Ring: dig up the Tantari treasure
Knightly Ring: dig up the Tantari treasure
Continue: Briar Sloughs treasure: map, tree and shovel
Briar Sloughs treasure: map, tree and shovel
Choose another treasure-map route
Match the document or journal name to the route below. Split Rock and Pond Islet are separate Rockfalls activities; Tantari Woods is covered in the Knightly Ring guide.
- Laslea Glen
- Briar Sloughs
- Riverbank
- Rockfalls — Split Rock
- Rockfalls — Pond Islet
- Tantari Woods
- Boar’s Back
For each route, distinguish collecting the map, reaching the soil, digging and looting the chest. Read the dig’s time prompt; ordinary walking is not that paid interaction. Container descriptions and rewards differ in some accounts, so use each linked guide’s item checks rather than treating an overview as a guaranteed loot table.