To disrupt the mire camp, defeat its guards, then interact with the highlighted leech barrels. Killing the guards alone leaves the second objective unfinished. Budget three time segments for the activity.
Find the correct camp
- Finish the Prologue before looking for this Court Activity. Search the Briar Sloughs marshes for the camp with tents, flags and a wooden approach. On arrival, check that the journal actually names Bounty of the Mire rather than another collector camp.
- If you already found an Urgent Letter or Instructions from Ambrus, read it and select the relevant journal entry. The accounts disagree about how many sibling entries each document opens; a letter is not necessary to start the camp by approaching it.
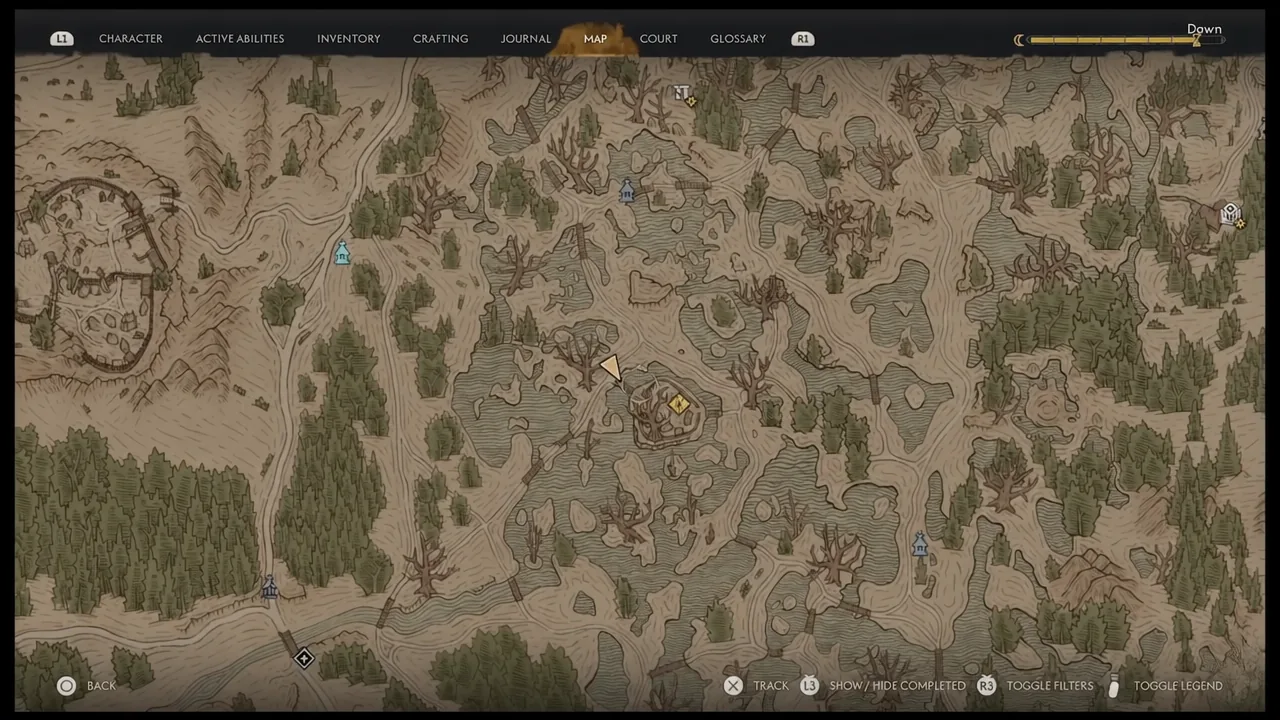
The sources describe different nearby landmarks, including Sloughside Hill and Ambrus’s Outpost. The map below is useful terrain context, but its unnamed marker is not independent proof of a precise quest location. Confirm the quest name before committing to the fight.
The leech investigation still has not advanced
If the tracker asks why Ambrus’s soldiers need leeches, use Focus to check bodies for Instructions from Boyar Ambrus, then open the document in your inventory. Collecting it and reading it are separate checks. Revisit the journal afterward: resolving this investigation does not prove the barrel activity is finished. Review any newly listed collector tasks individually; sources disagree about how many this document unlocks.
Clear the guards and resolve the barrels
- Defeat the camp soldiers. If the tracker still asks for guards, search the perimeter for a survivor before returning to the barrel stack. You do not need to attack peaceful collectors simply because they are standing nearby.
- Search bodies and containers before finishing. Focus Mode can reveal the soldier carrying Ambrus’s instructions. Different accounts list different manuals and recipes, so this is not a guaranteed Precision Manual farming location.
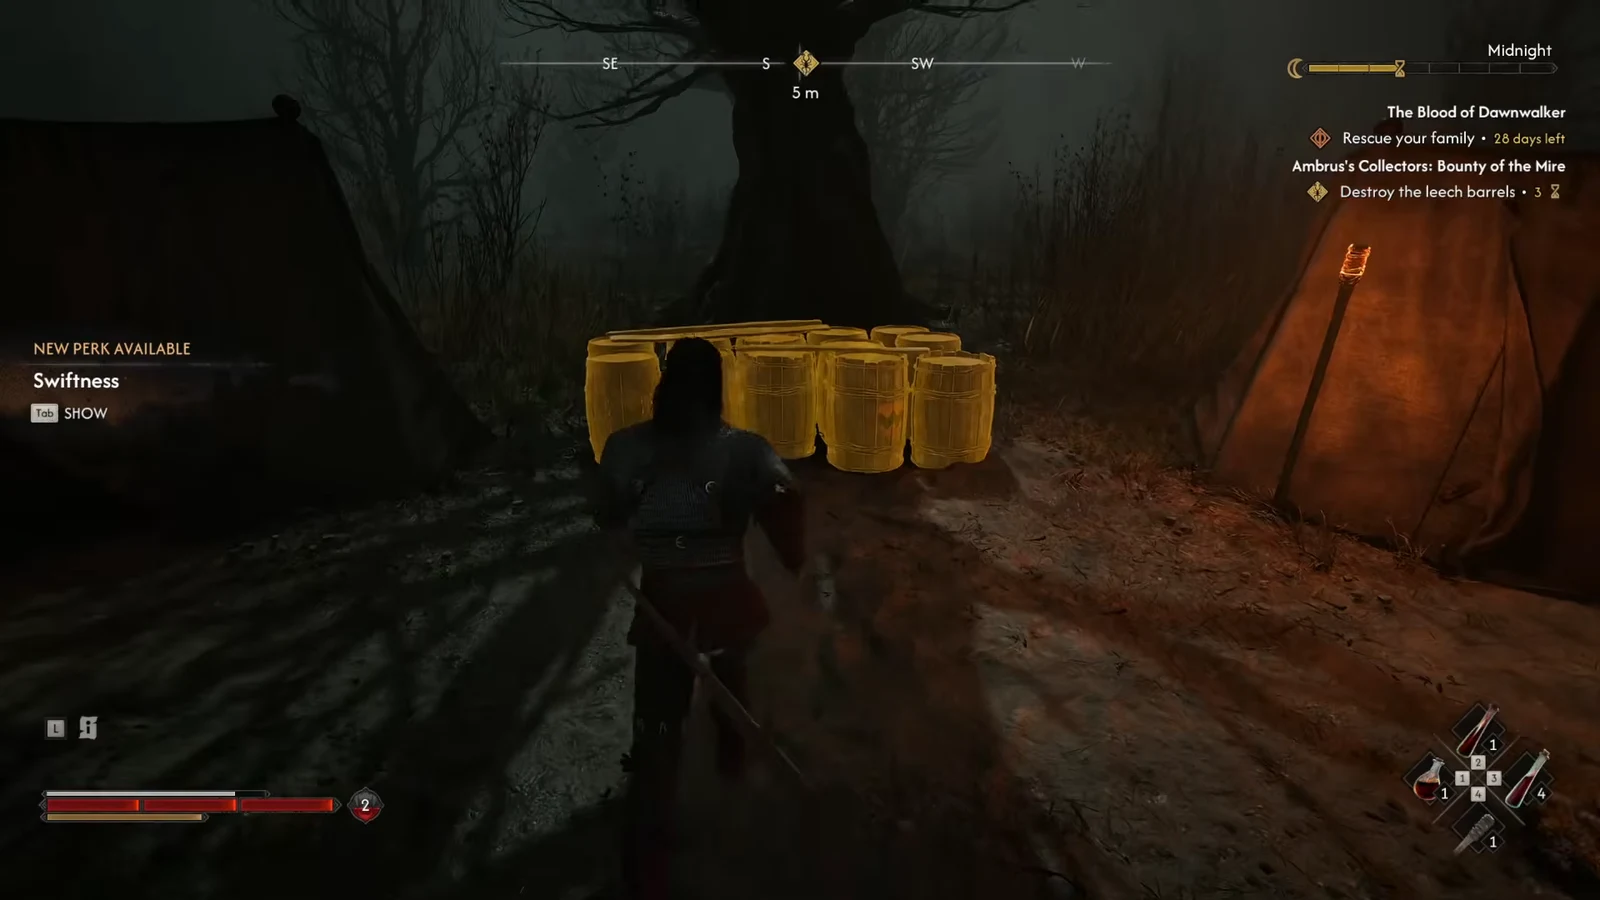
- Find the highlighted barrel stack beside the tree and tent. Use its interaction prompt and resolve the collectors’ conversation. To follow the supply-destruction route, choose to destroy the haul and let the scene finish.
Destroy or spare the haul?
Destroying the barrels is the route consistently described by the walkthroughs and the independent activity checklist. Collectors can plead for their livelihood; a hostile response may lead to fighting them. Saving before the decision lets you review the alternative without assuming its consequences.
Still unconfirmed: whether sparing the barrels gives the same rewards and increases Ambrus’s anger. ATH’s accounts contradict one another here. Claims that sparing all three camps always causes a progression bug also lack independent confirmation in the checked sources.
Check the result before leaving
- Check the completion banner, journal and Court menu after the scene. Do not use the time skip alone as proof that the supply was destroyed. The barrel screenshot shows the correct objective and its three-segment cost; its separate Swiftness notification is not a quest reward guarantee.
Continue with Wetland Helpers and Unsavoury Solutions. The reported Bloodletter trigger and exact first-discovery locations still need verification. Continue with Court Activities or Ambrus’s boss quest.