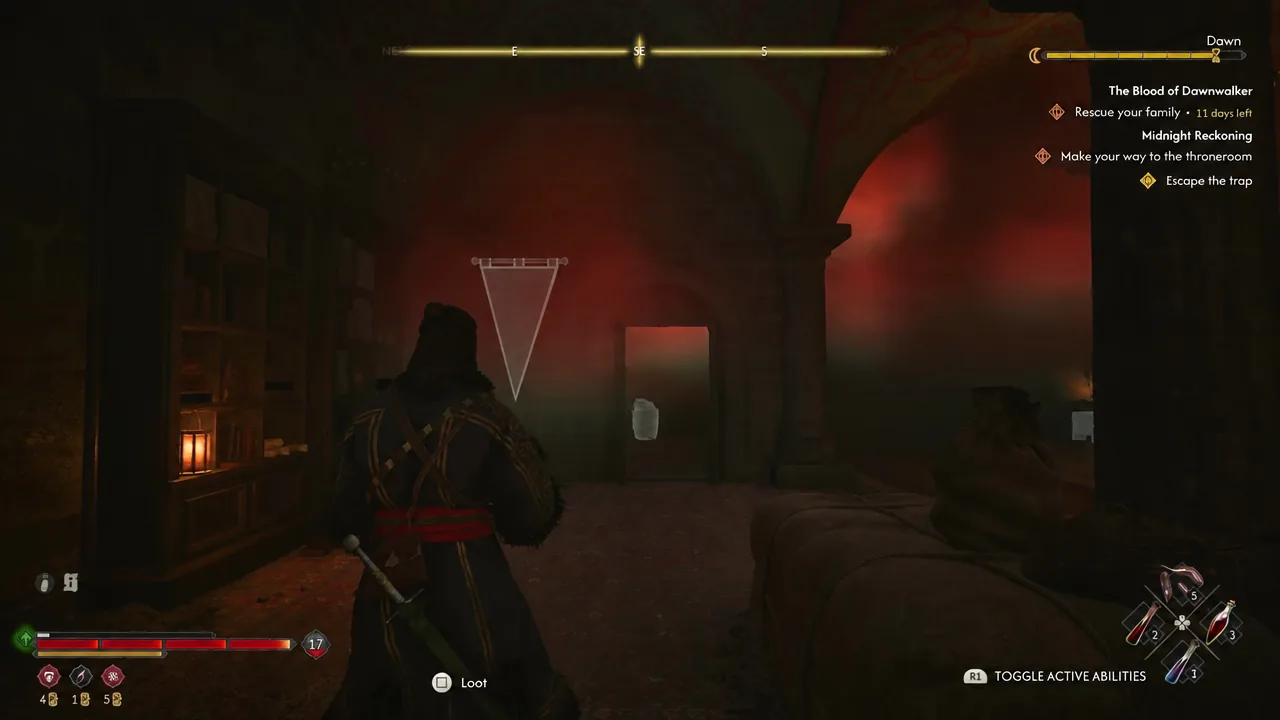
Complete Our Rotten Roots, wait for Lacra’s next conversation and prepare a manual save before committing to the assault. If the castle traps you in repeating rooms, follow the marked doorways rather than trying to eliminate every wave.
Prepare the final commitment
- Finish Our Rotten Roots and allow the requested day to pass. Return to Lacra at Westridge Outpost Tower and check the readiness objective.
- Complete optional content first, including The Night of Horrors if you want its rewards. It is not a romance requirement for this ending route.
- Make a separate manual save before confirming the attack. The point-of-no-return prompt is your last opportunity to defer; do not plan on finishing unfinished side quests after the finale.
Lacra survival preparation — ending spoilers
ATH's Lacra survival article links her recovery after Brencis's attack to sharing the mandrake during The Night of Horrors before this assault. Complete that expedition and check its outcome before committing; romance alone is not the stated protection. The article also describes survival when Brencis is defeated without her, but this is not proof that every alternative choice preserves her. Its two-day preparation wait conflicts with the one-day route already compared here. Follow the active quest and retain a pre-assault save; neither exact timing nor every ending variant has been firsthand verified.
Basement, temple and dungeon
- In the Svartrau house, go downstairs and find the crack beside the barrels with Focus Mode. Squeeze through, descend into the ruins and follow the cave route.
- Defeat the gargoyle, cross the gap, climb the stairs and let Lacra open the wall. Clear the temple soldiers, pass the metal doors and wait for her ritual interruption before taking the next exit.
- Climb the scaffolding toward the dungeon. Continue past the talking corpses and use the upper ledge to progress; enemies can differ according to which Boyars remain alive.
- Reach the courtyard, clear its opponents and ascend the floating stones. Follow the ledges around to the castle entrance, then continue toward the throne room.
Escape the repeating rooms
- If Escape the trap appears, clear only enemies obstructing movement. Search doorways for the downward-pointing triangular banner with the tentacled-eye design. Read the symbol rather than counting how many banners hang there.
- On the first loop, enter the matching side room, move the highlighted bookcase and descend through its hidden opening.
- In the next room, identify the matching banner again, move the curtain and use the opening behind it. For the last loop, repeat the symbol check and descend through the final opening.
- Follow the corridor until the journal returns to the throne-room objective. A familiar-looking room is part of the loop; an empty room does not prove the trap has ended.
ATH associates this trap with Xanthe’s hostile branch. The other walkthrough covers different Xanthe encounters without describing the maze. Apply these steps when the trap objective is active, rather than assuming every save must enter it. Do not promise that skipped loot can be recovered after the ending.
Final choice and boss phases
Show ending decisions and final combat — major spoilers
Reject Brencis’s bargain and defeat him alongside Lacra to pursue The Patricide. The Turncoat offer has additional family-survival conditions in PowerPyx’s account; do not assume it is available in every save.
The first phase includes blockable melee strikes and ranged attacks to evade. In the second, the fight moves to Anachora without Lacra; dodge the scream and large-arm attacks rather than attempting a normal block. Continue through the epilogue after winning. Return to your pre-assault save if you want unfinished side content or another ending.
Requirements that should not be overstated
One ATH article says every Boyar must already be defeated. PowerPyx instead records replacement boss encounters when they remain alive. Clearing them can simplify the assault, but the sources do not justify presenting it as a universal unlock requirement. Likewise, escaping the maze advances this quest; it does not finish the entire ending before Brencis.
Identify the doorway marker